
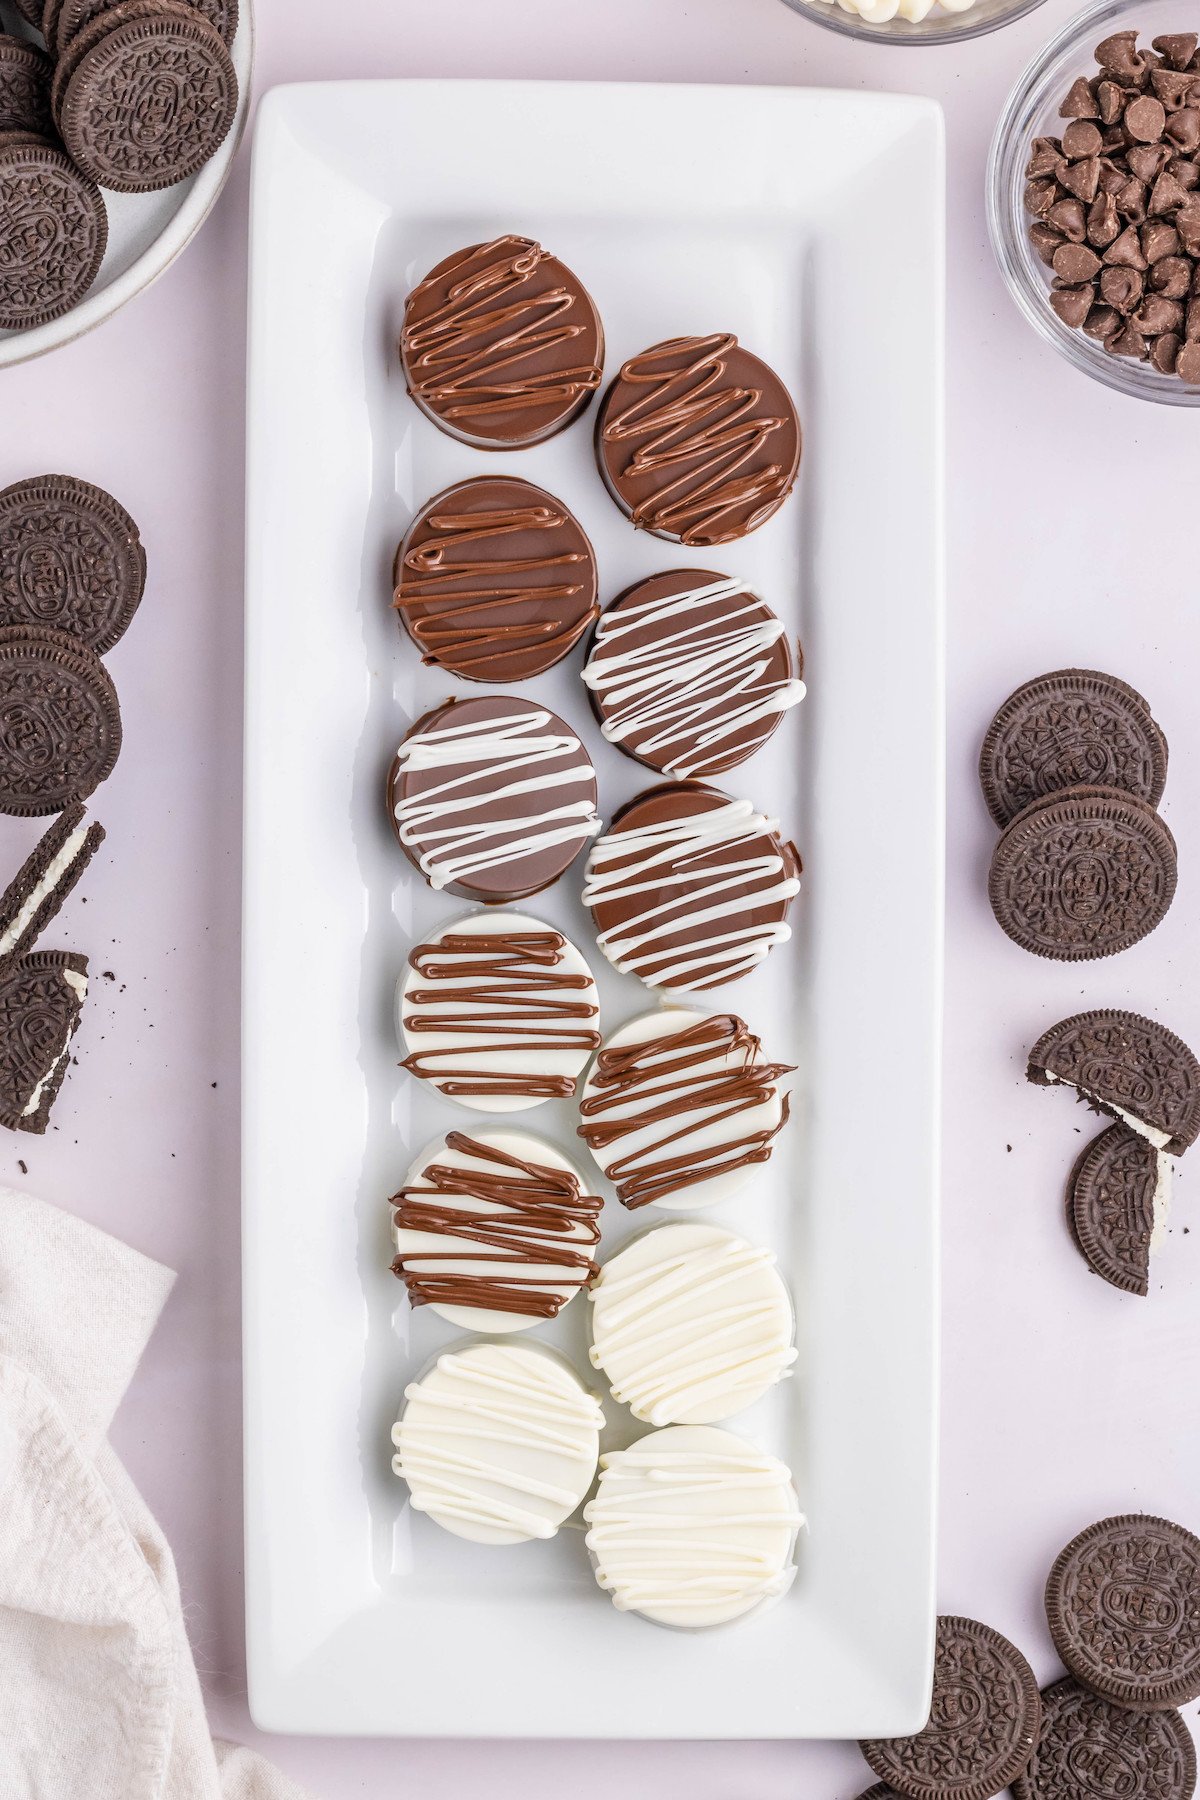
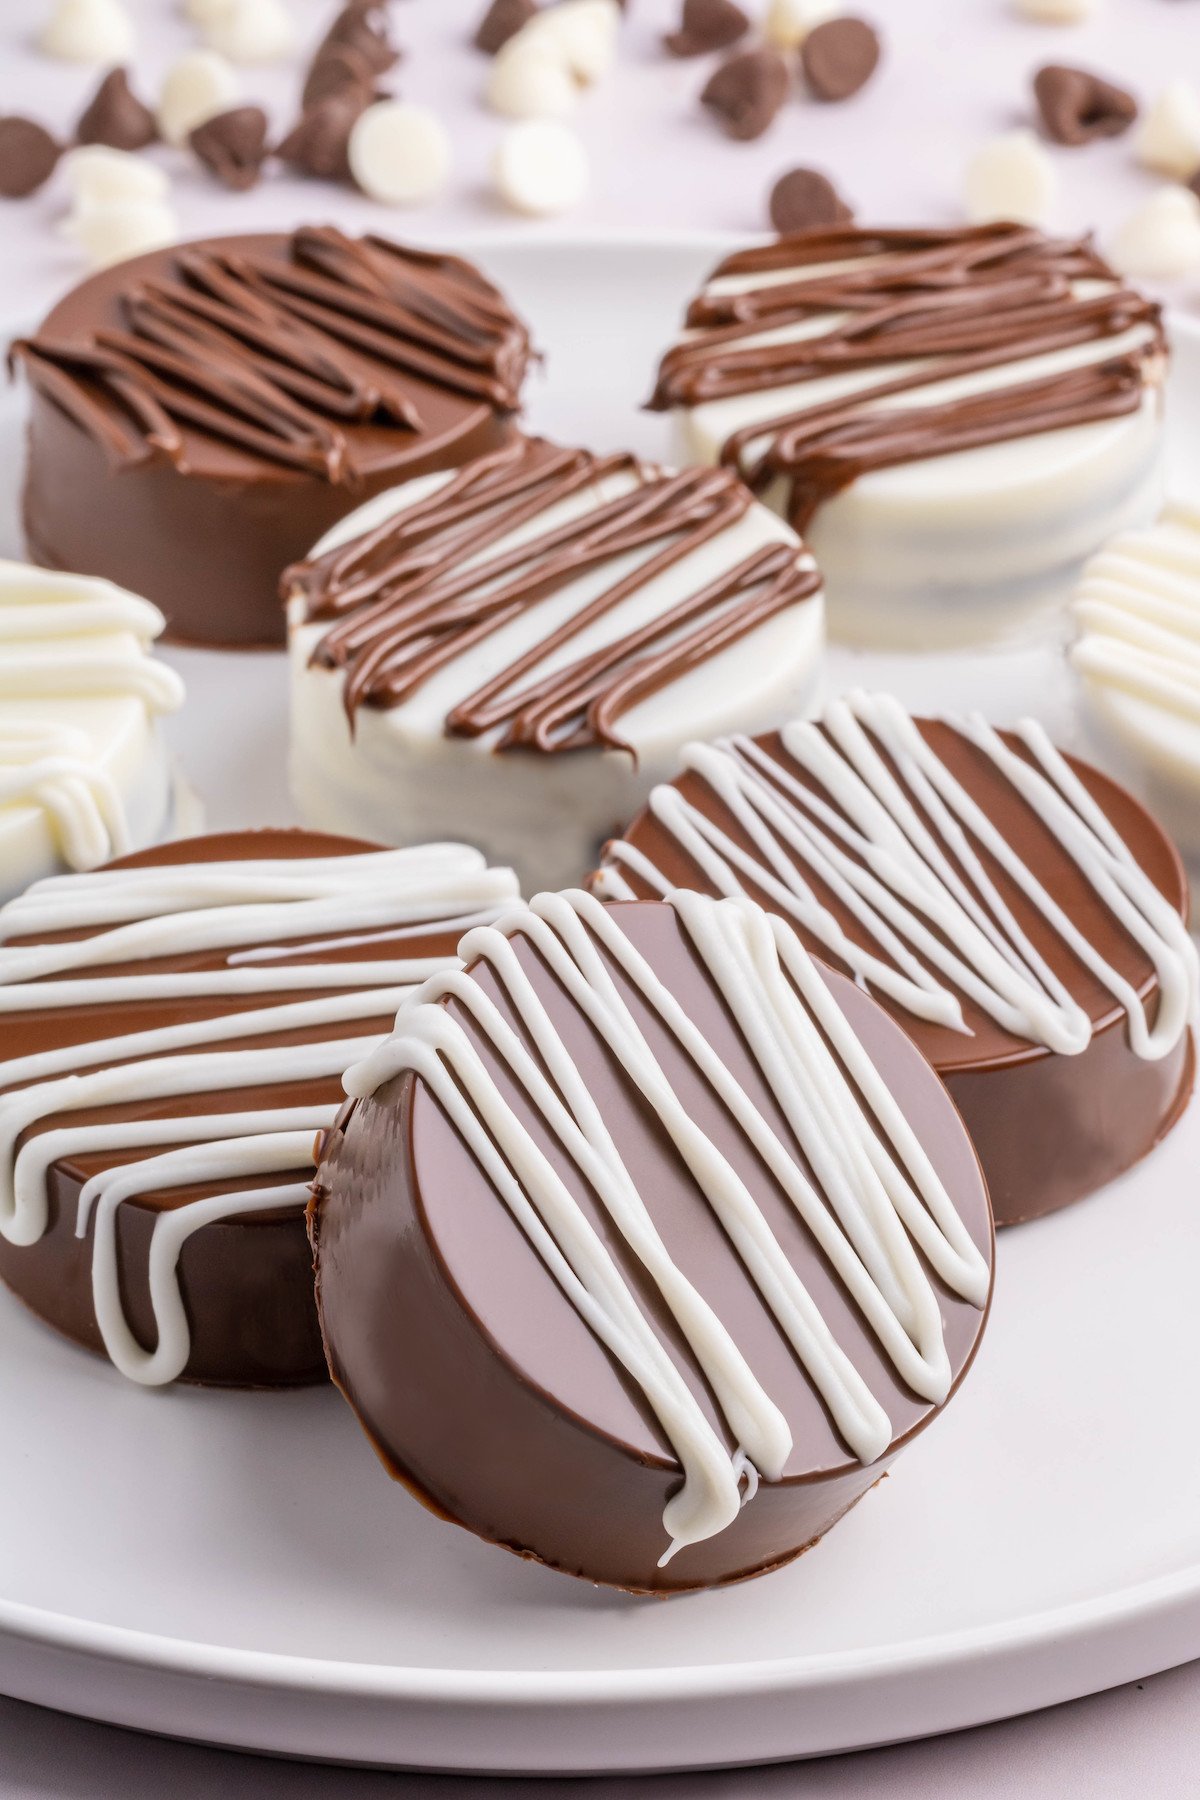
Indulge in the ultimate treat with these rich homemade chocolate covered Oreos. They’re an impressive looking no-bake dessert that even a novice can make with ease!
Is it possible to improve upon the Oreo, America’s favorite packaged cookie? The answer is yes and it’s easier than you might expect – cover it in chocolate.
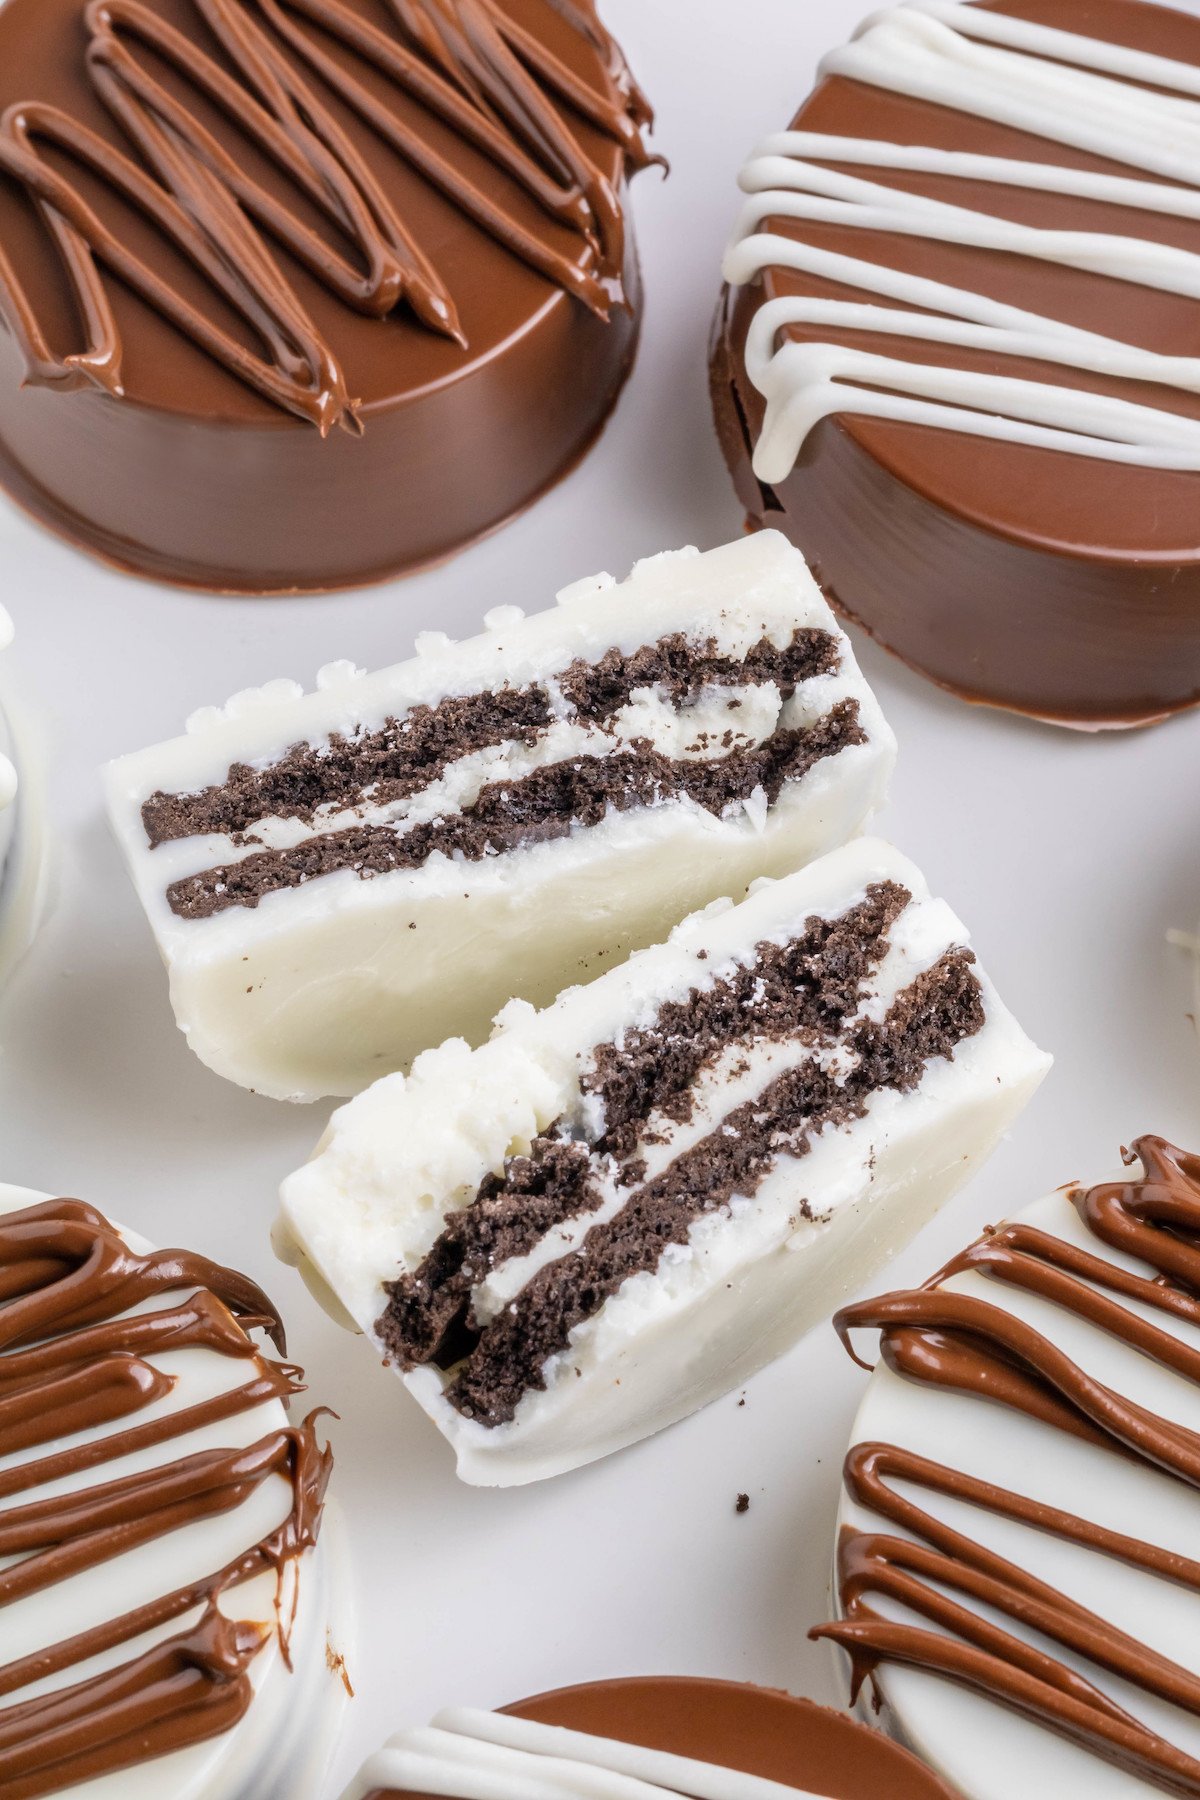
If you’ve ever had chocolate covered Oreos you know I’m right! The rich, sweet chocolate coating truly takes it to the next level.
The truth is it’s so simple to make that even a beginner-level cook can do it and the cookies turn out looking like they are from a professional bakery. Your friends and family will be so impressed!
One of my favorite parts is how versatile they are. With very little effort, you can customize them to suit any occasion or taste.
The type of chocolate you use can be easily substituted to any you prefer and topping them with festive sprinkles allows you to serve them on any holiday. I often include them in my Christmas cookie boxes.
If you’re looking for more ways to use Oreos in the kitchen, try this cookies and cream pie or an Oreo dirt cake. For the holidays, my cookie dough stuffed Oreos are a must-make!
Ingredients
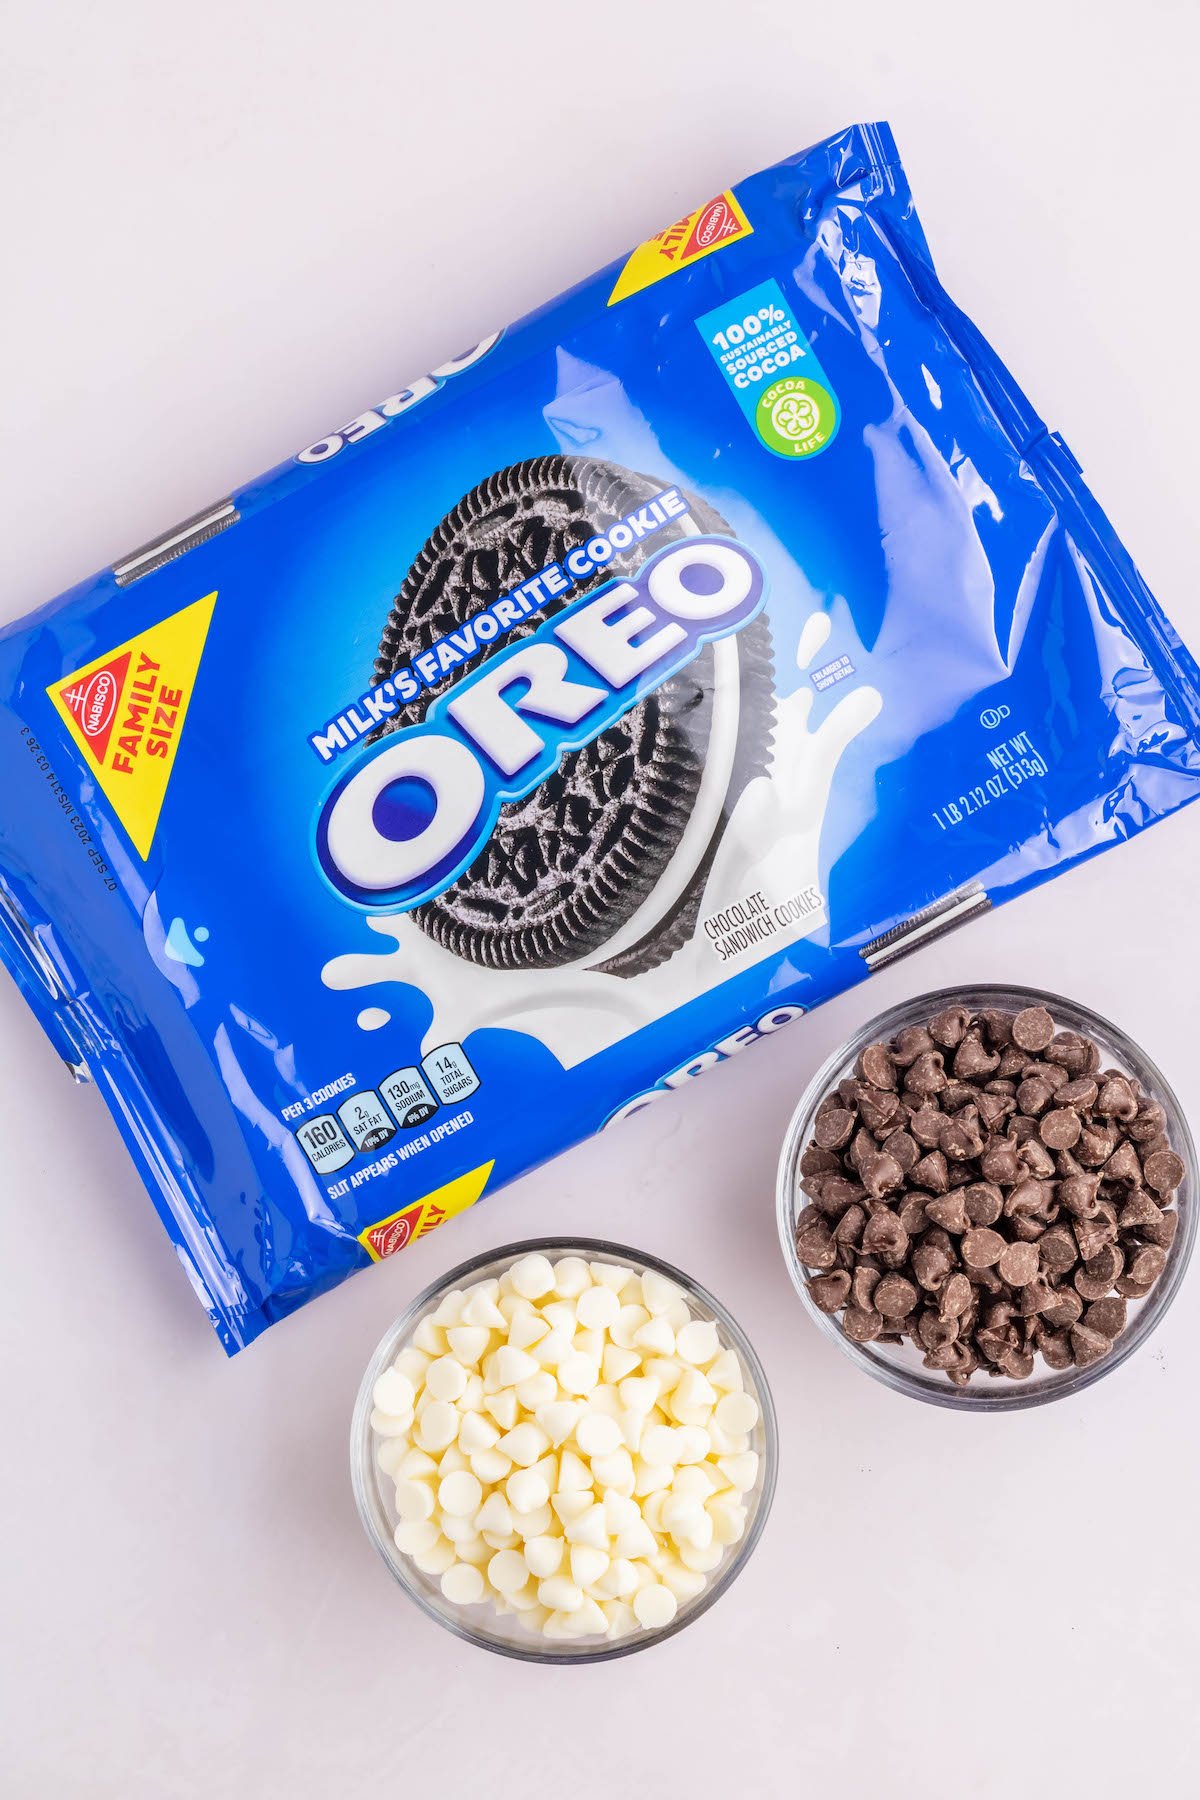
- Oreos – I used standard Oreo cookies. You can also use double stuffed or one of the wild and crazy flavored ones.
- Chocolate – I used chocolate chips, but you could substitute candy melts. You can use any type of chocolate (white, dark, milk) you’d like, or multiple kinds.
I also recommend using a mold. There are many different options but I used this one. (If you don’t have a mold, you can dip the Oreos in the melted chocolate with a fork, then set to dry on parchment paper. They aren’t quite as pretty, but still as delicious!)
This post contains affiliate links (when you buy we make a little money at no cost to you). See our disclosure for more information.
How To Make
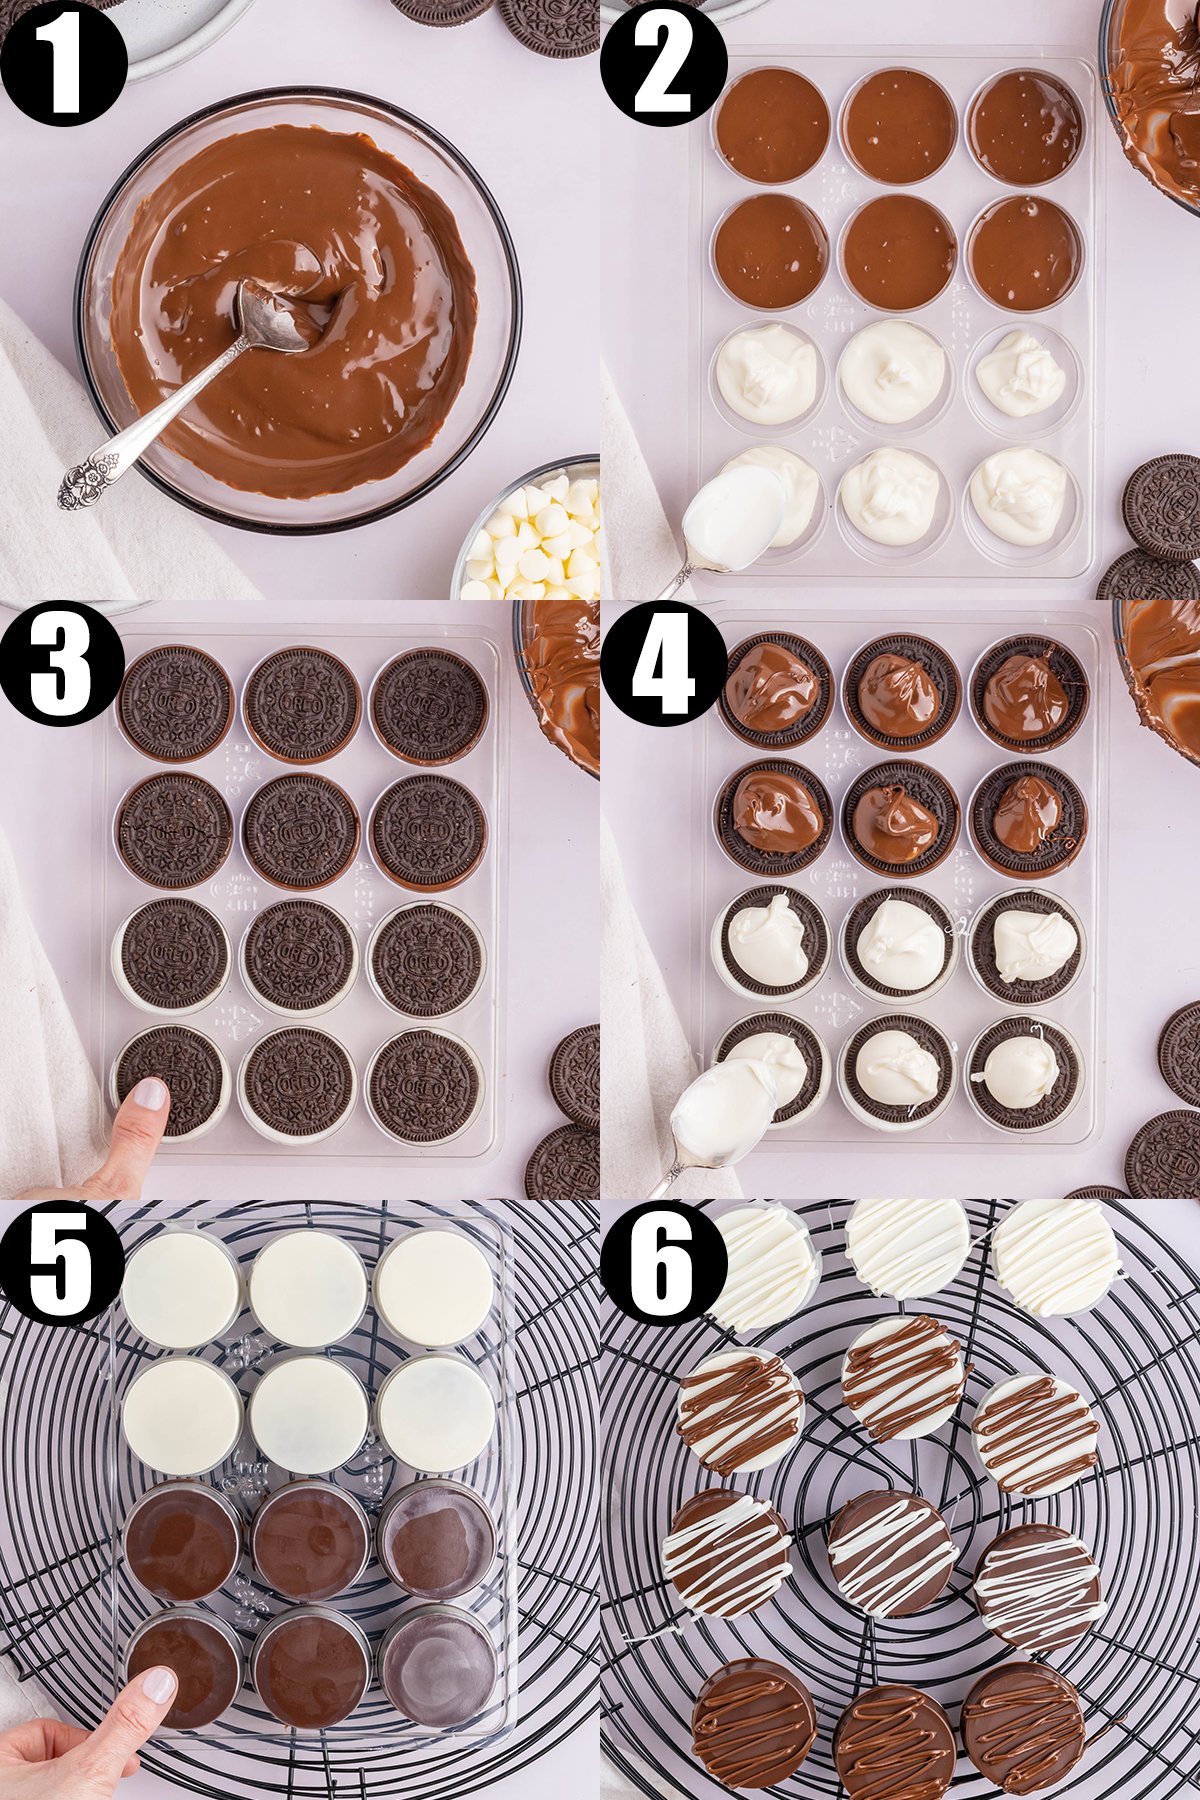
- Melt the white chocolate and milk chocolate in separate bowls in the microwave.
- Fill each chocolate mold 1/3 of the way with the melted chocolate.
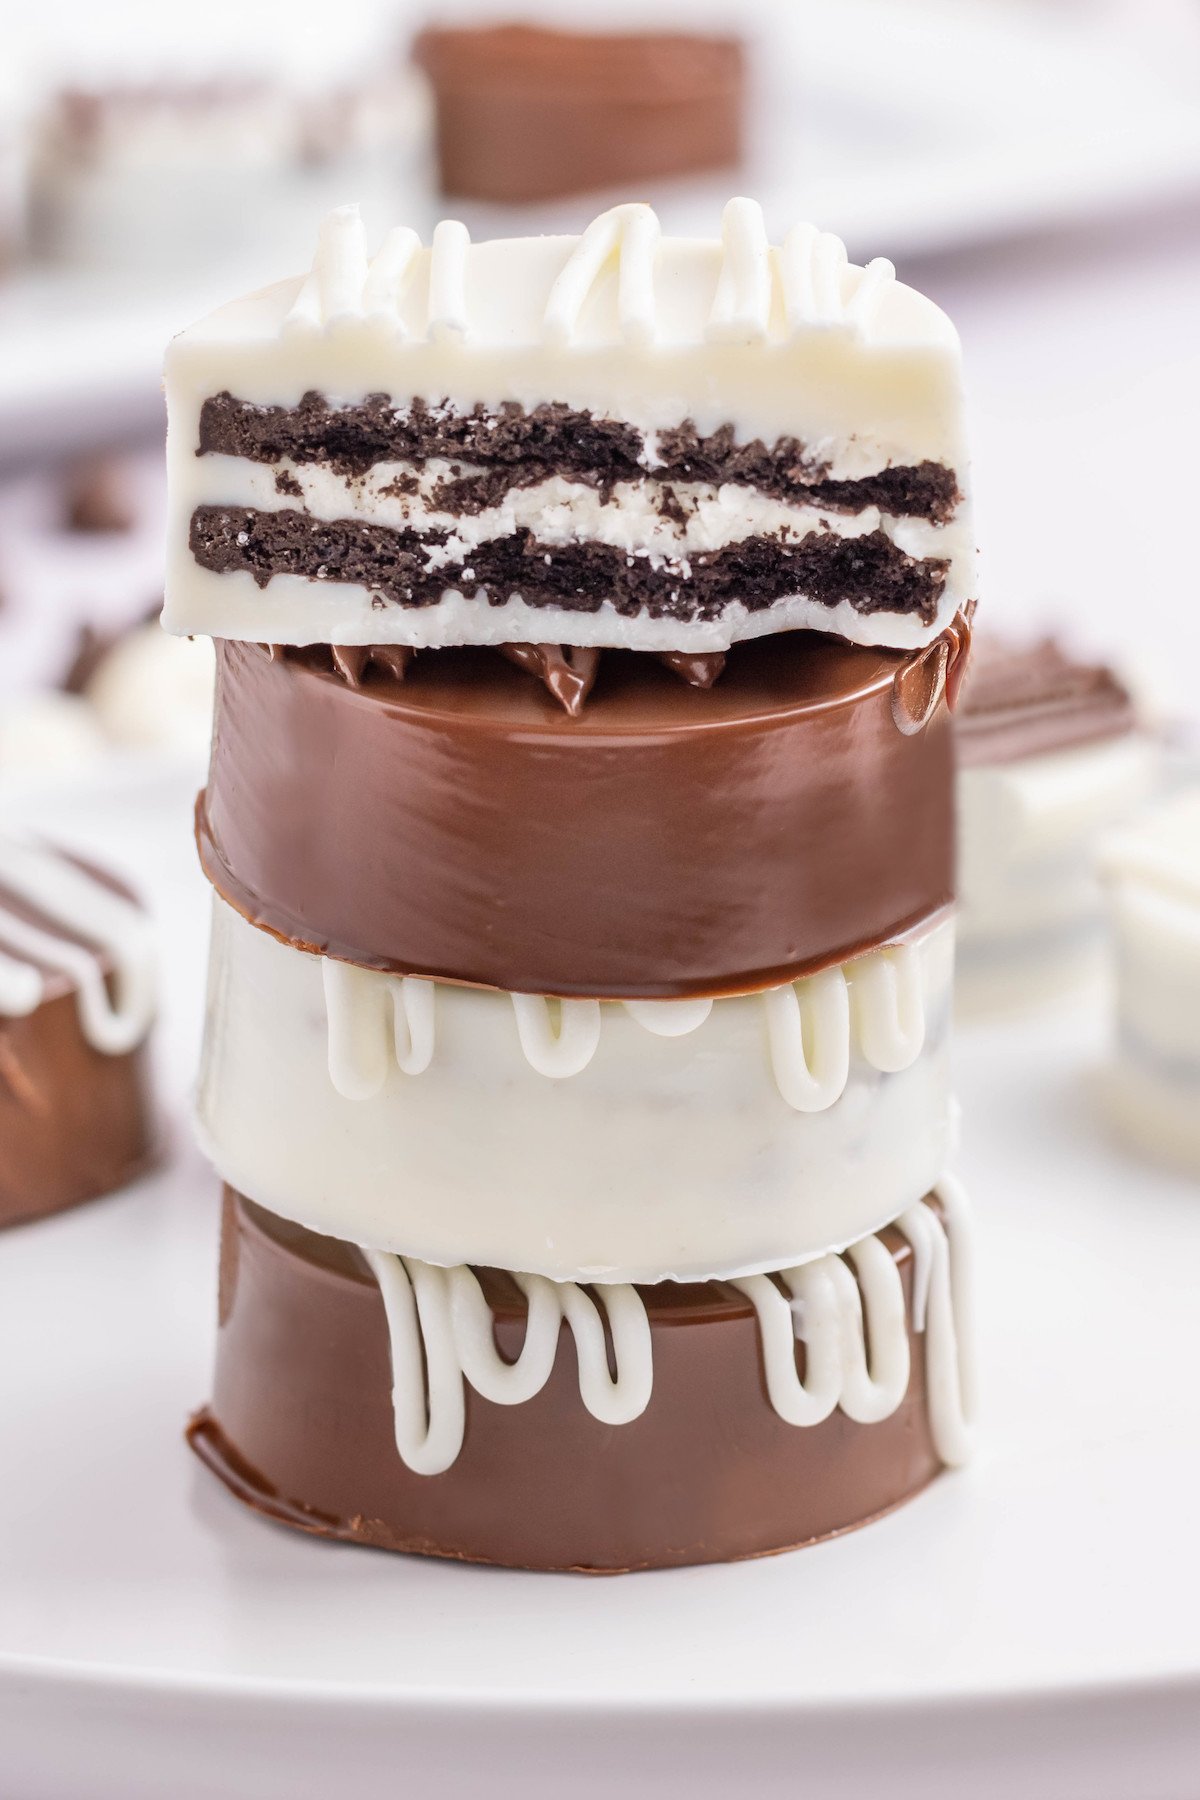
- Place Oreos on top and press down until its sides are covered.
- Add a tablespoon of chocolate on top and spread with a toothpick so Oreo is covered.
- Place in fridge for about 30 minutes until chocolate is set. Carefully press each cookie out of the mold.
- If desired, reheat some of the leftover chocolate and drizzle over the tops of the chocolate covered Oreos.
Tips
- No microwave? Use a double boiler to melt the chocolate. Be careful not to overheat it or it will become too thick to dip.
- Chocolate gets soft very quickly and will take on fingerprints. It is best to release the Oreos from the mold directly onto your serving platter after the chocolate is set.
- Customize these cookies by adding sprinkles, crushed candy canes, nuts, dehydrated fruit or other toppings before the drizzled chocolate hardens.
How To Store
Store them in an airtight container at room temperature or in the fridge for up to four weeks. You can store them in the freezer up to 6 months.
FAQs
Can I use other types of cookies instead of Oreos?
Absolutely! Try using Nutter Butters, graham crackers, or even vanilla wafers.
Can I use different types of chocolate?
Of course! Dark, milk, or white chocolate all work well for this recipe.
Can I make this without the mold?
You sure can! Using a fork, dip your Oreos straight into the bowl of melted chocolate, tap to remove the excess chocolate, then place on parchment paper to cool. You could also melt your chocolate in a deep and narrow jar – it works great if you put a lollipop stick into the center of the cookie to dip the Oreo in the chocolate. Now you have Oreo lollipops!
Can I make these in advance?
Yes, they can be made a week in advance. Store in an airtight container in the fridge for best results.
Save this Recipe for Later!
Send this recipe to your inbox so you can easily find it!
By using this form, you agree to receive emails from Cooking with Janica.
Chocolate Covered Oreos

Ingredients
- 12 Oreos
- 2 cups of milk chocolate
- 2 cups of white chocolate
Instructions
- In two medium bowls add the chocolate to each bowl. Make sure the white and milk chocolate don’t mix.
- In the microwave melt one bowl at a time for 20-second increments until melted. Mix in between each time you microwave. Stir until the chocolate chips have fully melted.
- With a spoon, fill each mold ⅓ of the way up.
- Place the Oreos on top of the chocolate and press the cookie down until the sides get covered.
- With the spoon, add 1 tablespoon of the melted chocolate on top of the cookie. Use a toothpick to spread the melted chocolate so the cookie is fully coated.
- Add more chocolate if it is needed to fully cover the Oreo and have it level with the top of the mold.
- Gently tap the mold on the counter so the chocolate is fully distributed.
- Place the mold in the fridge for 30 minutes or on the counter at room temperature for 60 minutes or until fully solid.
- Carefully press each cookie out of the mold.
- Heat up the chocolate from the bowls again. Heat for 20-second increments or until fully melted.
- Scoop the chocolate into sandwich bags. Cut a very small hole in the tip of the sandwich bag. Drizzle the chocolate on top of each cookie.


Leave a Reply